Thursday, 25 February 2010

Food


As those Python Boys would say "and now for something completely different".

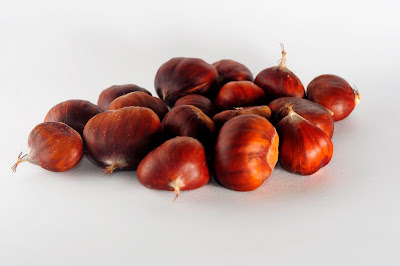
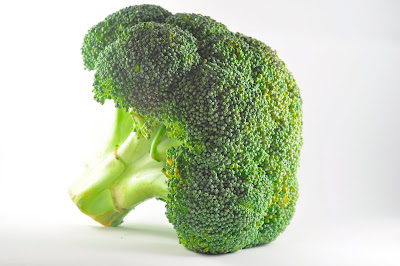
Food, a subject I hold very close to my heart. The story here is once again the need for something to go on our walls at home, this time for the kitchen.

I knew I wanted that popular clean white background look so that the entire focus of the eye is on the subject, in this case fruit and veg. There are, I'm sure many ways of doing this but here is how I achieved it.

Things you'll need:

Your camera
Sheets of plain white A4 paper (the boring office kind will do)
Two or three Speedlights
Bluetack
Photoshop (or any other good editing software)


I started by making a box shape out of the sheets of paper, securing them with the blue tack and placing the speedlights behind them. The sheets of paper would act as diffusers, nicely lighting the food and keeping the background nice and white.

I shot with my camera tethered to my laptop via USB and 'Nikon Camera Control Pro 2' software. This would speed things up considerably, allowing me to view the images on screen in real time, assess and make adjustments if needed. Once I had roughly the image I was looking for it was a case of opening it up in PS using a bit of the paint brush tool to iron out that white background a little or, in fact for most of the pictures I used the select tool to select the item of food, inversed the selection and simply tweaked the brightness getting the background back to pure white.

As for camera and lenses, I used the Nikkor 50mm f/1.8, I triggered the speedlights via 'CLS' or 'Creative Lighting System' basically, in a nutshell using the onboard pop-up flash to talk to the speedlights telling them not only when to fire, but how much power ect. I find it to be quite an easy system to use, generally I use it on manual as It gives more consistent results, but I do have to say I find iTTL to be a safe/quick option too when needed.

In this case I was in 'A' mode, ISO set to 200 and power output of the flashes at 1/16th of the power (again to make the background as white as possible). I set the aperture to f/1.8 and I decreased the aperture size until the correct look was achieved, and took a few frames with that.

I moved the speedlights around until the shadows were where I wanted them to be, on some pictures I used the pop-up flash as a fill light too.

Each different item of food produced a different lighting challenge which made it quite a lengthy but fun exercise.

I also made this time-lapse video to help illustrate what was going on.


Hope this helps, Don't forget to subscribe and comment if you need further information.

Wednesday, 24 February 2010

Malaga Night Shot


Another Landscape, during a recent trip over to Spain I made it my mission to get some pictures to print to grace our walls at home.

We knew from previous visits to Malaga that there is a great view point where you can see the city, not too far away from where we were staying with my Brother. The only problem was the hike up to it - quite a steep climb up many steps, BUT as they say 'no pain no gain'.

We made the climb of death up to the view point just as the sun was dropping below the horizon. I got my breath back and set up the tripod and took a good look around. I think there are a lot of times where you can easily be so eager to get shooting that you slap the camera to your face and start firing away without taking a good look around at what there is - it can be so easy to miss great shots that way. Someone once told me "look back and look up" and I really do feel that is a good philosophy to follow. There are many times where I remember this, and turn around to a great shot that I was walking away from and would have missed.

So after a good old look at whats about, I turn to my camera bag, get the body nicely secure on the tripod and think about lens choice which this time for me was an easy choice as I wanted to used my newly purchased Nikkor 10.5mm f/2.8 Fish Eye, a great lens because of its 180 degree field of view, but perhaps not the first choice for landscape due to the heavy distortion BUT after sticking it on the camera and taking a few shots I was happy with the wide coverage I was getting. I find that IF you want to use this lens in these circumstances the best practice to place the horizon slap-bang in the middle of the frame, that way it keeps the horizon straight (althought it does make some interesting images if you break that rule too).

By now the light is fading fast so to get any kind of colour out of the sky I would have to move fast. I started off by setting the ISO down to its lowest setting to keep the picture free from noise and as I was on a tripod this would not give me any problems. Next, to keep everything sharp I used 'Aperture Priority', set the aperture to f/22 which is the minimum for this lens which gave me a shutter speed of 30 secounds, again not a problem because the camera was steady. White balance was auto as I'd be tweeking that later. As for metering I chose to use 'Matrix', spot was making too many silhouettes of the forground, focus to manual and set to infinity, although at this aperture who cares - everything will be in focus. Not forgetting to use 'Exposure Delay' to lock the mirror up and out of the way as not to shake the camera when I fire the shutter.

I took plenty of shots, playing around with angles and moving up and down distorting the horizon, moved around the view point looking for different angles, used a few different lenses getting detail with the Tele for example. Once I was happy that I'd covered all I could, we made our way back to base and took a closer look at the results. With this particular image I actualy edited in camera. I adjusted the white balance a little and saved it as a jpg file and hey presto.


Remember any questions or comments pleases stick 'em below or email me.

Monday, 22 February 2010

हाउ इट्स दोने.


So here we go, my first post on my new blog.

The idea here is to post about my photography (obviously) but also to give a little insight into how some of my photographs are taken instead of simply just showing off my work, in the hope that maybe some of you out there will perhaps learn from my mistakes and/or get ideas into furthering their photography.

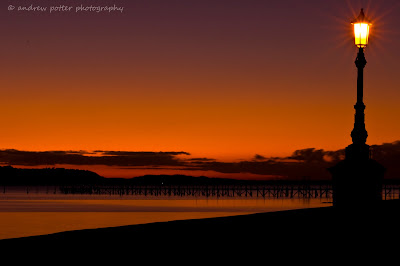
So image number one, and I have chosen this picture to start because for me, it typifies what I love about photography. This was taken on the way home from a day at work, I am a firm believer in taking my camera everywhere possible even if it means leaving it in the boot of the car or packing a small backpack with a body, a choice of lenses and perhaps a speedlight say, but one thing I never leave home without is my Manfrotto (Bogen) 'Super Clamp' with a ball head mounted on it, its lightweight and so easy to fit into my small back pack (which by the way is a Lowepro 'Slingshot 100AW' for those who are interested) the only downside to this however is there has to be something to clamp to, but I haven't yet been stuck without and lamp-post, railing or wall to use (touch wood!!)

As I was driving home I knew I to had to pull over and get a shot of the wonderful sunset that was unfolding, so I drove up the road until I saw the angle I wanted.

Now, I knew from experience that a shot in this low light would either require high ISO setting (which is always a last resort as far as I'm concerned because of the loss in image quality due to 'noise') OR use a steady surface. In this case my choice of stability for the SUPERclamp was a good old fashioned park bench. Because of the versatility of the ball head I was able to compensate for the dodgy angle it provided me and keep the camera level with the horizon which is kind of a golden rule in landscape photography. So, using the composition grid over-laid on to the the view finder image (very useful by the way), I levelled up the shot.

Now I always try to take second to think about how I want my picture to look, in this case I wanted that dreamy look on the sea which is achieved by leaving the shutter open for extended periods of time, which was not a problem in this circumstance because my camera was all clamped up and wasn't going anywhere. I needed a long lens to get me over the wall which was about 3ft in-front of me so I used my Nikkor 70-300mm f/4.5 and set the ISO to its lowest setting to make sure I got the best quality, set the camera to 'Aperture Priority' or 'A' mode, set the aperture to f/11 (I always try to use f/8 or f/11 where possible as they are generally speaking the best for quality and saturation ect). Why f/11? well I wanted the shutter open for a longer period of time so f/11 was the obvious choice over f/8 which would have meant the camera would have selected a slower shutter speed because of the extra light that it would have allowed in to the sensor. To minimise vibration I used the 'Exposure Delay Mode' which flips the mirror up then fires the shutter eliminating any movement caused by the mirror. Then I pulled the trigger.

I took several shots from different angles, each time making sure I checked the results on screen, zooming in to check focus (which was manual and set to infinity and beyond). I knew I didn't have to worry about white balance because I was shooing RAW so I would tweak that later in Photoshop anyway, but I think I set it to Open Sun just to give me an idea. I also experimented with metering, which determines where the camera reads the light from i.e. the centre of the frame or an average of the entire frame. In the end I settled for the latter - 'Matrix'.

Once I had a few shots (and by this time the sun was gone anyway so it was time up) I packed up and continued on my way home for dinner.

Later that evening, I put my memory card into my laptop and opened up the photos. I quickly browsed through and deleted the ones I didn't like, short listed the ones I thought would work best and one-by-one I opened them in photoshop, again just really only tweaking the white balance and blacks a little. I do make a big effort to try and get the picture right at the time I'm taking it, as my post processing is not yet as great as it could be and it saves work in the long run, so once I've edited all the chosen pics and added my logo, I re-save them as high quality jpg files and there you have it, my creativity for the day is done.


If you have any questions please post them or e-mail me andypotter3@hotmail.com.