There are MANY ways to shoot food not all of them requiring you to remortgage your property (see my blog post from last year).
For me there are three key points. Firstly perspective: some people will try to shoot from above the dish! Big mistake, I always think of a fast food take-away menu where you squint up at the boards and carefully select which grease filled kebab you want to stuff your face with. I like to set up on a dinner table and sit at a chair. This will give a “diners” view. It is how the food is going to be viewed when it is brought to the table. Subconsciously this works best for me.
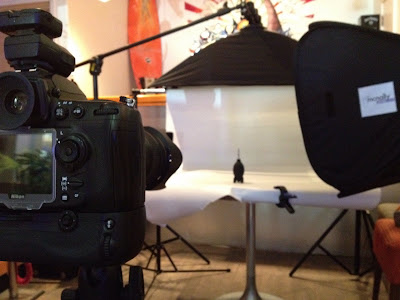
Next, lighting always a challenge but the fun part. Take a look at Google, search food pictures. One thing you will notice is that predominantly you will see a strong backlight. So the back light is our key/main light and we base all other lights from there (see below how I have built the lighting).
I’m a sucker for shooting on white backdrops, for food this works especially well as the client is offered more versatility with regards to making menus, posters ECT. Upon delivery of the pictures, they can take them and seamlessly slot them into any marketing or promotional material they want. Also I feel this method provides a clean look that offers no destractions to the eye what so ever.
Let’s take a look at the role each light plays:
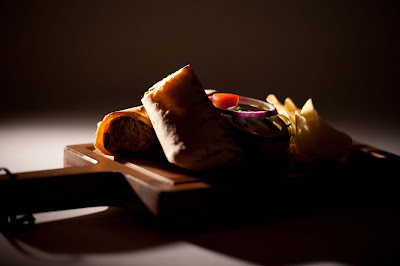
Demonstrated by this delicious (and reasonably priced) Tuna Wrap. We can see here that we start with our key/main light, this was an SB-600 with a Honl 1/4 grid for specula light with plenty of direction to hit the food right across the top without giving me lens flare problems. Admittedly in this example she is a little hot but for an illustration we can see how this light will provide the shine, shape and give the photo depth.
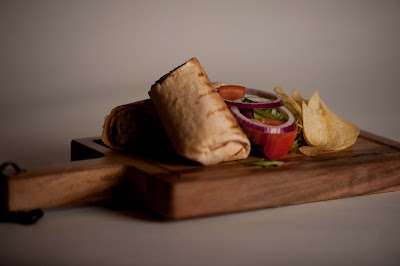
OK, lets add a second light, some fill provided by this SB-900 via a Lastolite 54cm softbox at about 45 from camera position off the right. I have gridded it for extra control. This will fill the shadows and give a three dimensional feel the plate.
Next I lit the backdrop (A Colourama "Arctic White" paper off-cut) with a Lastolite 40X120 strip softbox mounted on a heavy duty boom stand upside down and positioned horizontally above the paper.
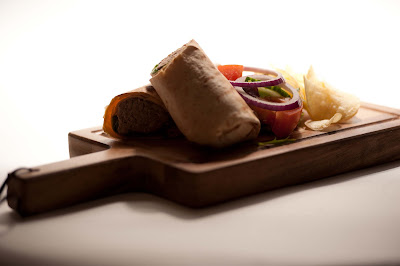
We use the internal and external baffles to stop hard shadows forming in front of our subject.
NB: Another way to combat this would be to move the plate further from the back drop, a luxury I did not have on this occasion.
Here is the set up from my position.
So lets take a look at these lights now put together side by side:

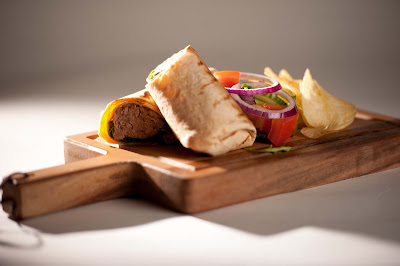
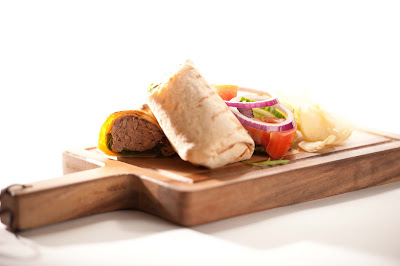
You should now see that each light 'sauce' ;-) ....excuse the pun, has it role to play.
I used PW's to trigger my flashes and shot predominantly with the Nikkor 105mm Micro. To give a different feel on some dishes I also shot with a 24mm lens to give an augmented feel to some of the plates.
Some will say not to cook the dishes, and for full time food 'togs' perhaps this works best, however I find that a freshly cooked meal and ready set up studio is fine.
Do make sure you have a generous supply of kitchen roll handy and perhaps on occasion a spray bottle of olive oil to add shine if required.
This is a nice, quick and clean method of shooting food.
Enjoy

No comments:
Post a Comment